The following practice questions are for Salesforce developers who are new to salesforce and wish to solve some basic programming questions. Develop the following Visualforce pages in your salesforce developer org.
1. Create a page that displays the detail page same as of the Account object along with its related lists
Click here to learn more
<apex:detail subject=”{!account.id}” relatedList=”true” title=”false”/>
</apex:page>
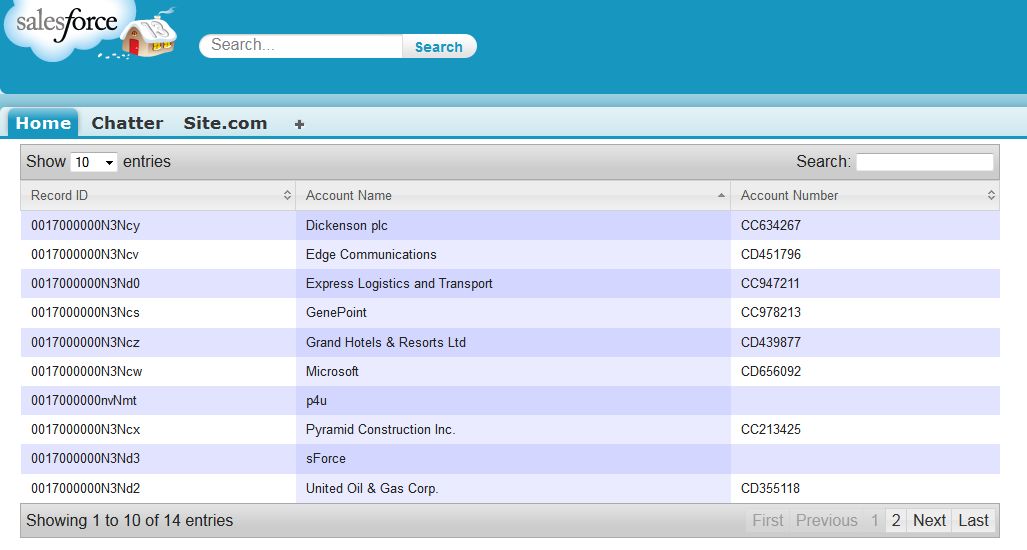
2. Create a page that shows a datatable having 100 records.
Click here to learn more
<apex:sectionHeader title=”Account List”/>
<apex:form >
<apex:dataTable value=”{!accountList}” var=”a”>
<apex:facet name=”header”>Account Name</apex:facet>
<apex:column value=”{!a.Name}”></apex:column>
</apex:dataTable>
</apex:form>
</apex:page>
public class PageBlockTable {
public list<Account> accountList{get;set;}
public PageBlockTable(){
accountList = new list<Account>();
accountList = [SELECT id,name FROM Account LIMIT 100];
}
}
3. Create a scrollable list of datatable that has 20 records.
Click here to learn more
<apex:sectionHeader title=”Account List”/>
<apex:form >
<apex:outputPanel layout=”block” style=”overflow:auto;width:850px;height:350px” >
<apex:dataTable value=”{!accountList}” var=”a” >
<apex:facet name=”header”>Account Name</apex:facet>
<apex:column value=”{!a.Name}”></apex:column>
</apex:dataTable>
</apex:OutputPanel>
</apex:form>
</apex:page>
public class PageBlockTable {
public list<Account> accountList{get;set;}
public PageBlockTable(){
accountList = new list<Account>();
accountList = [SELECT id,name FROM Account LIMIT 200];
}
}
4. Develop the logic which shows/ hides the custom button “Test”. If the Opportunity>Stage = “Won” on an Opportunity record then the button should be displayed.
Click here to learn more
<apex:form >
<apex:pageBlock >
<div style=”display:none;”>
dasdasdadda
</div>
<apex:outputPanel id=”abcd”>
<apex:commandButton value=”test” rendered=”{!dadasda}”/>
</apex:outputPanel>
<apex:inputField value=”{!opportunity.stageName}”>
<apex:actionSupport event=”onchange” action=”{!onCHeck}” rerender=”abcd” />
</apex:inputField>
</apex:pageBlock>
</apex:form>
</apex:page>
public class opportunityhide {
public boolean isTrue{get;set;}
public boolean dadasda{get;set;}
public Opportunity opp{get;set;}
public opportunityhide(ApexPages.StandardController controller) {
dadasda = false;
opp =(opportunity) controller.getRecord();
}
public void onCHeck(){
if(opp.stageName==’Closed Won’) {
dadasda = true;
}
else
{
dadasda = false;
}
}
}
5. Create a dataList that has 200 records and shows 10 records per page.It should have pagination with “Next” and “Previous” features in it. 
Click here to learn more
extensions=”AccountStandardSetController”>
<apex:sectionHeader title=”Account List”/>
<apex:form >
<apex:dataTable value=”{!Accounts}” var=”a”>
<apex:facet name=”header”>Account Name</apex:facet>
<apex:column value=”{!a.Name}”></apex:column>
</apex:dataTable>
<apex:panelGrid columns=”2″>
<apex:commandLink action=”{!previous}”>Previous</apex:commandlink>
<apex:commandLink action=”{!next}”>Next</apex:commandlink>
</apex:panelGrid>
</apex:form>
</apex:page>
public class AccountStandardSetController {
public AccountStandardSetController(ApexPages.StandardSetController controller) {
controller.setPageSize(20);
}
}
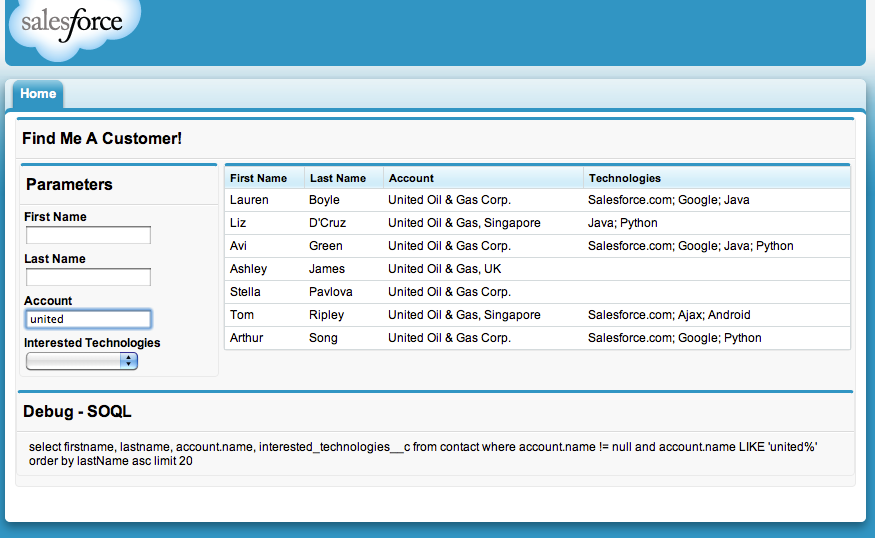
6. Create a page that has a text box and a datatable having column(Name, Phone, Postal Code and city) and in text box text is entered and on the basis of it the data block searches and shows the name column along with other columns. 
Click here to learn more
<apex:sectionHeader title=”Account List”/>
<apex:form >
<apex:inputText value=”{!searchstring}” label=”Input”/>
<apex:commandButton value=”Search records” action=”{!search}”/>
<apex:commandButton value=”Clear records” action=”{!clear}”/>
<apex:pageBlock title=”Search Result”>
<apex:PageblockTable value=”{!accountList}” var=”a” >
<apex:column value=”{!a.Name}”/>
<apex:column value=”{!a.Phone}”/>
<apex:column value=”{!a.Billingcity}”/>
<apex:column value=”{!a.BillingPostalcode}”/>
</apex:pageBlockTable>
</apex:pageBlock>
</apex:form>
</apex:page>
public class DateBlock {
public String searchstring { get; set; }
public list<Account> accountList{get;set;}
public list<list<Account>> accList{get;set;}
public DateBlock(){
accountList = new list<Account>();
accountList = [SELECT id,name,Phone,Billingcity,BillingPostalcode FROM Account LIMIT 100];
system.debug(‘****’+ accountList); }
public PageReference search() {
accountList.clear();
accountList = [SELECT id,name,Phone,Billingcity,BillingPostalcode FROM Account WHERE Name =:searchstring
OR Phone =:searchstring OR Billingcity =:searchstring OR BillingPostalcode =:searchstring];
return null;
}
public PageReference clear() {
accountlist.clear();
accountList = [SELECT id,name,Phone,Billingcity,BillingPostalcode FROM Account LIMIT 100];
return null;
}
}
7. Create an inline Vf page that shows the message(Close date is near) on opportunity when a particular opportunity’s close date is 5 days ahead.
Click here to learn more
<apex:sectionHeader title=”opportunity close date “/>
<apex:outputpanel rendered=”{!flag}” >you have closed it near by </apex:outputpanel>
</apex:page>
public class oppdate {
public string abc{get;set;}
public boolean flag{get;set;}
public oppdate(ApexPages.StandardController controller) {
//customcont=(Contact)controller.getRecord();
String abc = controller.getId();
opportunity oppobject =[SELECT id,CloseDate FROM opportunity where id = :abc];
if(oppobject.CloseDate >= Date.Today() && oppobject.CloseDate<= Date.Today().addDays(4))
flag=true;
else
flag=false;
}
}
8. Create a page that displays confirmation message and the Accounts Name(Eg: Do you really want to inert the new record with Name : test ) and asks for confirmation before saving it.
Click here to learn more
<apex:sectionHeader title=”Account Edit” subtitle=”New Account”/>
<apex:form >
<script>
function testingNew(){
var abcd = document.getElementById(‘{!$Component.thePageBlock.adadasd.nameId}’).value;
return confirm(‘Are you sure want to save ‘+abcd);
}
</script>
<apex:pageBlock title=”Account Edit” id=”thePageBlock” >
<apex:pageBlockButtons >
<apex:pageMessages id=”showmsg”></apex:pageMessages>
<apex:commandButton value=”save” action=”{!onsave}” onclick=”return testingNew();” />
<apex:commandButton value=”save&new” />
<apex:commandButton value=”cancel”/>
</apex:pageBlockButtons>
<apex:pageBlockSection title=”Account Information” id=”adadasd”>
<apex:pageBlockSectionItem id=”sectionId” > Owner {!$User.FirstName} {!$User.LastName}
</apex:pageBlockSectionItem>
<apex:inputfield value=”{!acc.Rating}” />
<apex:inputfield value=”{!acc.name}” id=”nameId” />
<apex:inputfield value=”{!acc.Phone}” />
<apex:inputfield value=”{!acc.ParentId}” />
<apex:inputfield value=”{!acc.Fax}” />
<apex:inputfield value=”{!acc.AccountNumber}” />
<apex:inputfield value=”{!acc.Website}” />
<apex:inputfield value=”{!acc.Site}” />
<apex:inputfield value=”{!acc.TickerSymbol}” />
<apex:inputfield value=”{!acc.type}” />
<apex:inputfield value=”{!acc.Ownership}” />
<apex:inputfield value=”{!acc.Industry}” />
<apex:inputfield value=”{!acc.NumberOfEmployees}” />
<apex:inputfield value=”{!acc.AnnualRevenue}” />
<apex:inputfield value=”{!acc.SIC}” />
</apex:pageBlockSection>
</apex:pageBlock>
</apex:form>
</apex:page>
public with sharing class Testnew {
public Account acc{get;set;}
public Testnew(ApexPages.StandardController controller) {
acc = new Account();
//Account account = new Account()
acc = (Account)controller.getRecord();
}
public pageReference onSave(){
insert acc;
PageReference page = new PageReference(‘/’+acc.id);
return page;
}
}
9. Create a page with a custom mandatory lookup field (Contact). Once the user select a contact Other fields will automatically get filled (Contact’s Address, first name, last name)
Click here to learn more
<apex:SectionHeader title=”contact” subtitle=”New Contact”/>
<script type=”text/javascript”>
function checkField() {
var val = document.getElementById(‘{!$Component.theForm.thePageBlock.aaa.custm}’).value;
//alert(val);
if (val != null) {
document.getElementById(‘{!$Component.theForm.thePageBlock.aaa.tt}’).value = val;
}
}
</script>
<apex:form id=”theForm”>
<apex:pageBlock title=”Contact Edit” id=”thePageBlock”>
<apex:pageblockButtons >
<apex:commandButton value=”save” action=”{!save}”/>
<apex:commandButton value=”cancel” action=”{!cancel}”/>
</apex:pageblockButtons>
<apex:pageBlockSection id=”aaa” title=”information”>
<apex:inputfield value=”{!Contact.AccountId}” required=”true” onchange=”checkField();” id=”custm”/>
<apex:inputfield value=”{!Contact.LastName}” required=”true”/>
<apex:inputfield value=”{!Contact.Title}” id=”tt”/>
</apex:pageblockSection>
</apex:pageBlock>
</apex:form>
</apex:page>


October 22, 2015
nice blog sir
it’s so helpful for sfdc beginner..
too good 🙂
April 27, 2018
nice blog sir
it’s so helpful sfdc beginner…